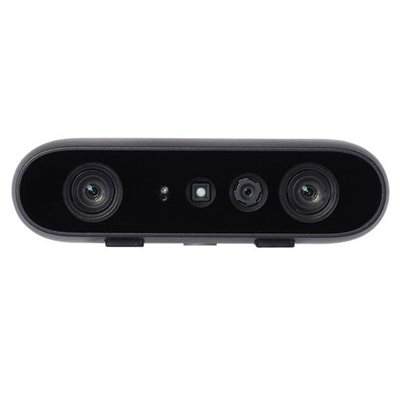
Orbbec SDK 文档
欢迎阅读Orbbec SDK(以下简称“SDK”)的使用教程!SDK 不仅提供了简洁的高阶API,又提供全面、灵活的低阶API,能够让您更快速的了解和使用奥比中光3D传感摄像头。
代码示例——Android示例说明
获取所有示例都可以在工程的OrbbecSdkExamples目录中找到
| 名称 | 语言 | 描述 | 支持产品 |
|---|---|---|---|
| HelloOrbbec | Java | 演示连接到设备获取SDK版本和设备信息 | 全部 |
| 深度示例 | Java | 通过Pipeline开启指定配置彩色流并渲染 | 绝大部分,有depth的产品 |
| 彩色示例 | Java | 通过Pipeline开启指定配置深度流并渲染 | 绝大部分,有Color的设备 |
| 红外示例 | Java | 通过Pipeline开启指定配置红外流并渲染 | 部分,有IR并且不是左右IR的产品 |
| 双IR示例 | Java | 通过Pipelie开启指定 配置左右IR渲染 | 部分,有左右IR的产品 |
| 流对齐示例 | Java | 演示对传感器数据流对齐的操作 | 绝大部分,支持depth和color的产品 |
| 热拔插示例 | Java | 演示设备拔插回调的设置,并获取到插拔后处理的流 | 全部 |
| IMU示例 | Java | 获取IMU数据并输出显示 | 部分,支持IMU的产品 |
| 多设备示例 | Java | 演示对多设备进行操作 | 全部 |
| 点云示例 | Java | 演示生成深度点云或RGBD点云并保存成ply格式文件 | 绝大部分,支持depth和color的产品 |
| 存储示例 | Java | 获取彩色存储为png格式,深度存储为raw格式以及通过filter进行格式转换 | 全部 |
| 传感器控制示例 | Java | 演示对设备和传感器控制命令的操作 | 全部 |
| 录制与回放示例 | Java | 连接设备开流 , 录制当前视频流到文件,载入视频文件进行回放。 | 绝大部分,支持depth的产品 |
Android
基础模块–BaseActivity
Example的Activity继承关系
BaseActivity______________________________|____________________________________| | | |HelloOrbbecActivity ColorViewerActivity ......(XXXActivity) DepthViewerActivity
- OBContext的初始化和释放;
- 分辨率获取;
OBContext的初始化和释放
OBContext是Orbbec SDK的入口,配置日志信息,管理设备。一个应用只能有一个OBContext实例,在OrbbecSdkExamples中,每个Activity都继承于BaseActivity,实际都是在BaseActivity#onStart()时初始化,在BaseActivity#onStop()时释放,始终维持一个OBContext实力。 注意:如果应用软件同时存在多个OBContext实例,那么可能会出错。 BaseActivity.java 演示OBContext的初始化和释放实现/*** OBContext is entry of OrbbecSDK, and support only one instance.*/protected OBContext mOBContext;protected abstract DeviceChangedCallback getDeviceChangedCallback();protected void initSDK() {try {if (BuildConfig.DEBUG) {// set debug level in codeOBContext.setLoggerSeverity(LogSeverity.DEBUG);}DeviceChangedCallback deviceChangedCallback = getDeviceChangedCallback();// 1.Initialize the SDK Context and listen device changesString configFilePath = getXmlConfigFile();if (!TextUtils.isEmpty(configFilePath)) {mOBContext = new OBContext(getApplicationContext(), configFilePath, deviceChangedCallback);} else {mOBContext = new OBContext(getApplicationContext(), deviceChangedCallback);}} catch (OBException e) {e.printStackTrace();}}protected void releaseSDK() {try {// Release SDK Contextif (null != mOBContext) {mOBContext.close();}} catch (OBException e) {e.printStackTrace();}}
@Overrideprotected void onStart() {super.onStart();initSDK();}@Overrideprotected void onStop() {releaseSDK();super.onStop();}
设备管理
阅读OrbbecSdkExamples的BaseActivity可以注意到BaseActivity是一个抽象类,抽象方法为protected abstract DeviceChangedCallback getDeviceChangedCallback();
public OBContext(Context context, DeviceChangedCallback callback);public OBContext(Context context, String configPath, DeviceChangedCallback callback);
DeviceChangedCallback实现
在DeviceChangedCallback管理设备变化,// 在实现设备发现private DeviceChangedCallback mDeviceChangedCallback = new DeviceChangedCallback() {@Overridepublic void onDeviceAttach(DeviceList deviceList) {// deviceList需要close释放资源try {int deviceCount = deviceList.getDeviceCount();for (int i = 0; i < deviceCount; ++i) {if (null == mDevice) {// Cautious: Same index inside deviceList can call DeviceList.getDevice(index) only once.mDevice = deviceList.getDevice(i); // Remember to close when mDevice no more usemDeviceInfo = mDevice.getInfo(); // Remember to close when mDeviceInfo no more use// use device to do something}}} catch (Exception e) {e.printStackTrace();} finally {// always release deviceListtry {deviceList.close();} catch (Exception e) {e.printStackTrace();}}}@Overridepublic void onDeviceDetach(DeviceList deviceList) {// deviceList需要close释放资源try {int deviceCount = deviceList.getDeviceCount();for (int i = 0; i < deviceCount; ++i) {// 获取断开设备的uidString uid = deviceList.getUid(i);// Check is current device disconnectionif (null != mDevice && mDeviceInfo.getUid().equals(uid)) {// stop stream if application has start stream// close pipelines if has pipleline create from mDevice// release device infomDeviceInfo.close();mDeviceInfo = null;// release devicemDevice.close();mDevice = null;}}} catch (Exception e) {e.printStackTrace();} finally {// always release deviceListtry {deviceList.close();} catch (Exception e) {e.printStackTrace();}}}};// BaseActivity的子类要返回callback,以满足OBContext初始化protected DeviceChangedCallback getDeviceChangedCallback() {return mDeviceChangedCallback;}
分辨率获取(单相机)
OrbbecSdkExamples实例有很多需要获取相机分辨率,并打开相机的功能;由于OrbbecSdkExamples是简单实例,仅支持渲染部分分辨率格式,所以获取分辨率时过滤掉不支持的分辨率格式。 通过Pipeline和SensorType获取分辨率/*** Get best VideoStreamProfile of pipeline support by OrbbecSdkExamples.* Note: OrbbecSdkExamples just sample code to render and save frame, it support limit VideoStreamProfile Format.* @param pipeline Pipeline* @param sensorType Target Sensor Type* @return If success return a VideoStreamProfile, otherwise return null.*/protected final VideoStreamProfile getStreamProfile(Pipeline pipeline, SensorType sensorType) {// Select prefer FormatFormat format;if (sensorType == SensorType.COLOR) {format = Format.RGB888;} else if (sensorType == SensorType.IR|| sensorType == SensorType.IR_LEFT|| sensorType == SensorType.IR_RIGHT) {format = Format.Y8;} else if (sensorType == SensorType.DEPTH) {format = Format.Y16;} else {Log.w(TAG, "getStreamProfile not support sensorType: " + sensorType);return null;}try {// Get StreamProfileList from sensorStreamProfileList profileList = pipeline.getStreamProfileList(sensorType);List<VideoStreamProfile> profiles = new ArrayList<>();for (int i = 0, N = profileList.getStreamProfileCount(); i < N; i++) {// Get StreamProfile by index and convert it to VideoStreamProfileVideoStreamProfile profile = profileList.getStreamProfile(i).as(StreamType.VIDEO);// Match target with and format.// Note: width >= 640 && width <= 1280 is consider best render for OrbbecSdkExamplesif ((profile.getWidth() >= 640 && profile.getWidth() <= 1280) && profile.getFormat() == format) {profiles.add(profile);} else {profile.close();}}// If not match StreamProfile with prefer format, Try other.// Note: OrbbecSdkExamples not support render Format of MJPEG and RVLif (profiles.isEmpty() && profileList.getStreamProfileCount() > 0) {for (int i = 0, N = profileList.getStreamProfileCount(); i < N; i++) {VideoStreamProfile profile = profileList.getStreamProfile(i).as(StreamType.VIDEO);if ((profile.getWidth() >= 640 && profile.getWidth() <= 1280)&& (profile.getFormat() != Format.MJPG && profile.getFormat() != Format.RVL)) {profiles.add(profile);} else {profile.close();}}}// Release StreamProfileListprofileList.close();// Sort VideoStreamProfile list and let recommend profile at first// Priority:// 1. high fps at first.// 2. large width at first// 3. large height at firstCollections.sort(profiles, new Comparator<VideoStreamProfile>() {@Overridepublic int compare(VideoStreamProfile o1, VideoStreamProfile o2) {if (o1.getFps() != o2.getFps()) {return o2.getFps() - o1.getFps();}if (o1.getWidth() != o2.getWidth()) {return o2.getWidth() - o1.getWidth();}return o2.getHeight() - o1.getHeight();}});for (VideoStreamProfile p : profiles) {Log.d(TAG, "getStreamProfile " + p.getWidth() + "x" + p.getHeight() + "--" + p.getFps());}if (profiles.isEmpty()) {return null;}// Get first stream profile which is the best for OrbbecSdkExamples.VideoStreamProfile retProfile = profiles.get(0);// Release other stream profilefor (int i = 1; i < profiles.size(); i++) {profiles.get(i).close();}return retProfile;} catch (Exception e) {e.printStackTrace();}return null;}
获取D2C分辨率
d2c对齐时,需要检查color和depth是否匹配,否则会导致D2C异常,以下示例展示如何获取匹配的D2C分辨率 为了方便,定义D2C的Java bean用于保存匹配的color和depth分辨率/*** Data bean bundle VideoStreamProfile of depth and color*/protected static class D2CStreamProfile implements AutoCloseable {// color stream profileprivate VideoStreamProfile colorProfile;// depth stream profileprivate VideoStreamProfile depthProfile;// getter && setter}
/*** Get D2CStreamProfile which contain color and depth* @param pipeline* @param alignMode* @return Success: D2CStreamProfile which contain color and depth. Failure: null.*/protected D2CStreamProfile genD2CStreamProfile(Pipeline pipeline, AlignMode alignMode) {// Config color profileVideoStreamProfile colorProfile = null;List<VideoStreamProfile> colorProfiles = getAvailableColorProfiles(pipeline, alignMode);if (colorProfiles.isEmpty()) {Log.w(TAG, "genConfig failed. colorProfiles is empty");return null;}for (VideoStreamProfile profile : colorProfiles) {if (profile.getWidth() >= 640 && profile.getWidth() <= 1280 && profile.getFormat() == Format.RGB888) {colorProfile = profile;break;}}if (null == colorProfile) {if (colorProfiles.size() > 0) {colorProfile = colorProfiles.get(0);} else {Log.w(TAG, "genConfig failed. not match color profile width >= 640 and width <= 1280");return null;}}// Release colorProfiles resourcefor (VideoStreamProfile profile : colorProfiles) {if (profile != colorProfile) {profile.close();}}colorProfiles.clear();// Config depth profileVideoStreamProfile depthProfile = null;List<VideoStreamProfile> depthProfiles = getAvailableDepthProfiles(pipeline, colorProfile, alignMode);for (VideoStreamProfile profile : depthProfiles) {if (profile.getWidth() >= 640 && profile.getWidth() <= 1280 && profile.getFormat() == Format.Y16) {depthProfile = profile;break;}}if (null == depthProfile) {if (depthProfiles.size() > 0) {depthProfile = depthProfiles.get(0);} else {Log.w(TAG, "genConfig failed. not match depth profile width >= 640 and width <= 1280");colorProfile.close();colorProfile = null;return null;}}// Release depthProfiles resourcefor (VideoStreamProfile profile : depthProfiles) {if (depthProfile != profile) {profile.close();}}depthProfiles.clear();D2CStreamProfile d2CStreamProfile = new D2CStreamProfile();d2CStreamProfile.colorProfile = colorProfile;d2CStreamProfile.depthProfile = depthProfile;return d2CStreamProfile;}
/*** Get available color profiles with AlignMode. If alignMode is ALIGN_D2C_HW_ENABLE or ALIGN_D2C_SW_ENABLE* Not all color stream profile has match depth stream profile list, This function will filter the color stream profile* when it match any depth stream profile under target alignMode.* @param pipeline* @param alignMode* @return Color stream profile list that has supported depth stream profiles.*/private List<VideoStreamProfile> getAvailableColorProfiles(Pipeline pipeline, AlignMode alignMode) {List<VideoStreamProfile> colorProfiles = new ArrayList<>();StreamProfileList depthProfileList = null;try (StreamProfileList colorProfileList = pipeline.getStreamProfileList(SensorType.COLOR)) {final int profileCount = colorProfileList.getStreamProfileCount();for (int i = 0; i < profileCount; i++) {colorProfiles.add(colorProfileList.getStreamProfile(i).as(StreamType.VIDEO));}sortVideoStreamProfiles(colorProfiles);// All depth profile are available when D2C is disalbeif (alignMode == AlignMode.ALIGN_D2C_DISABLE) {return colorProfiles;}// Filter color profile which unsupported depth profilefor (int i = colorProfiles.size() - 1; i >= 0; i--) {VideoStreamProfile colorProfile = colorProfiles.get(i);depthProfileList = pipeline.getD2CDepthProfileList(colorProfile, alignMode);if (null == depthProfileList || depthProfileList.getStreamProfileCount() == 0) {colorProfiles.remove(i);colorProfile.close();}// Release depthProfileListdepthProfileList.close();depthProfileList = null;}return colorProfiles;} catch (OBException e) {e.printStackTrace();} finally {// Release depthProfileList when encounter OBExceptionif (null != depthProfileList) {depthProfileList.close();depthProfileList = null;}}return colorProfiles;}
/*** Get target depth stream profile list with target color stream profile and alignMode* @param pipeline Pipeline* @param colorProfile Target color stream profile* @param alignMode Target alignMode* @return Depth stream profile list associate with target color stream profile.* Success: depth stream profile list has elements. Failure: depth stream profile list is empty.*/private List<VideoStreamProfile> getAvailableDepthProfiles(Pipeline pipeline, VideoStreamProfile colorProfile, AlignMode alignMode) {List<VideoStreamProfile> depthProfiles = new ArrayList<>();try (StreamProfileList depthProfileList = pipeline.getD2CDepthProfileList(colorProfile, alignMode)) {final int profileCount = depthProfileList.getStreamProfileCount();for (int i = 0; i < profileCount; i++) {depthProfiles.add(depthProfileList.getStreamProfile(i).as(StreamType.VIDEO));}sortVideoStreamProfiles(depthProfiles);} catch (OBException e) {e.printStackTrace();}return depthProfiles;}
private DeviceChangedCallback mDeviceChangedCallback = new DeviceChangedCallback() {@Overridepublic void onDeviceAttach(DeviceList deviceList) {Log.d(TAG, "onDeviceAttach");try {deviceList.close();} catch (Exception e) {e.printStackTrace();}dumpDevices();}@Overridepublic void onDeviceDetach(DeviceList deviceList) {Log.d(TAG, "onDeviceDetach");try {deviceList.close();} catch (Exception e) {e.printStackTrace();}dumpDevices();}};private void sortVideoStreamProfiles(List<VideoStreamProfile> profiles) {Collections.sort(profiles, new Comparator<VideoStreamProfile>() {@Overridepublic int compare(VideoStreamProfile o1, VideoStreamProfile o2) {if (o1.getFormat() != o2.getFormat()) {return o1.getFormat().value() - o2.getFormat().value();}if (o1.getWidth() != o2.getWidth()) {// Little firstreturn o1.getWidth() - o2.getWidth();}if (o1.getHeight() != o2.getHeight()) {// Large firstreturn o2.getHeight() - o1.getHeight();}// Large firstreturn o2.getFps() - o1.getFps();}});}
HelloOrbbec
功能描述:用于演示SDK初始化、获取SDK版本、获取设备型号、获取设备序列号、获取固件版本号、SDK释放资源。// Get device informationDeviceInfo info = mDevice.getInfo();builder.append("Name: " + info.getName() + "\n");builder.append("Vid: " + LocalUtils.formatHex04(info.getVid()) + "\n");builder.append("Pid: " + LocalUtils.formatHex04(info.getPid()) + "\n");builder.append("Uid: " + info.getUid() + "\n");builder.append("SN: " + info.getSerialNumber() + "\n");builder.append("connectType: " + info.getConnectionType() + "\n");String firmwareVersion = info.getFirmwareVersion();builder.append("FirmwareVersion: " + firmwareVersion + "\n");builder.append(dumpExtensionInfo(info.getExtensionInfo()));// Iterate through the sensors of the current devicefor (Sensor sensor : device.querySensors()) {// 8.Query sensor typebuilder.append("Sensor: " + sensor.getType() + "\n");}// Release device informationinfo.close();
彩色示例-ColorViewer
功能描述:本示例主要演示了SDK的初始化、设备创建、Pipeline的初始化及配置以及通过Pipeline开启指定配置彩色流并渲染。 从mDevice构建Pipeline并开流// check sensor Color existsSensor colorSensor = mDevice.getSensor(SensorType.COLOR);if (null == colorSensor) {mDevice.close();mDevice = null;return;}// Create Device and initialize Pipeline through DevicemPipeline = new Pipeline(mDevice);// Get stream profile BaseActivity#getStreamProfile(Pipeline, SensorType)VideoStreamProfile streamProfile = getStreamProfile(mPipeline, SensorType.COLOR);// Create Pipeline configurationConfig config = new Config();// 6.Enable color StreamProfileif (null != streamProfile) {printStreamProfile(streamProfile.as(StreamType.VIDEO));config.enableStream(streamProfile);streamProfile.close();} else {config.close();Log.w(TAG, "No target stream profile!");return;}// Start sensor streammPipeline.start(config);// Release configconfig.close();
private Runnable mStreamRunnable = () -> {ByteBuffer buffer = null;while (mIsStreamRunning) {try {// Obtain the data set in blocking mode. If it cannot be obtained after waiting for 100ms, it will time out.FrameSet frameSet = mPipeline.waitForFrameSet(100);Log.d(TAG, "frameSet=" + frameSet);if (null == frameSet) {continue;}// Get color flow dataColorFrame colorFrame = frameSet.getColorFrame();if (null != buffer) {buffer.clear();}Log.d(TAG, "frameSet=" + frameSet + ", colorFrame=" + colorFrame);if (null != colorFrame) {Log.d(TAG, "color frame: " + colorFrame.getSystemTimeStamp());// Initialize bufferint dataSize = colorFrame.getDataSize();if (null == buffer || buffer.capacity() != dataSize) {buffer = ByteBuffer.allocateDirect(dataSize);}// Get data and rendercolorFrame.getData(buffer);mColorView.update(colorFrame.getWidth(), colorFrame.getHeight(), StreamType.COLOR, colorFrame.getFormat(), buffer, 1.0f);// Release color data framecolorFrame.close();}// Release FrameSetframeSet.close();} catch (Exception e) {e.printStackTrace();}}};
try {// Stop the Pipeline and releaseif (null != mPipeline) {mPipeline.stop();mPipeline.close();mPipeline = null;}} catch (Exception e) {e.printStackTrace();}
深度示例-DepthViewer
功能描述:本示例主要演示了SDK的初始化、设备创建、Pipeline的初始化及配置以及通过Pipeline开启指定配置深度流并渲染。 从mDevice构建Pipeline并开流// Check sensor Depth existsSensor depthSensor = mDevice.getSensor(SensorType.DEPTH);if (null == depthSensor) {mDevice.close();mDevice = null;return;}// Create Device and initialize Pipeline through DevicemPipeline = new Pipeline(mDevice);// Get stream profile BaseActivity#getStreamProfile(Pipeline, SensorType)VideoStreamProfile streamProfile = getStreamProfile(mPipeline, SensorType.DEPTH);// Create Pipeline configurationConfig config = new Config();// 6.Enable depth StreamProfileif (null != streamProfile) {printStreamProfile(streamProfile.as(StreamType.VIDEO));config.enableStream(streamProfile);streamProfile.close();} else {config.close();Log.w(TAG, "No target stream profile!");return;}// Start sensor streammPipeline.start(config);// Release configconfig.close();
private Runnable mStreamRunnable = () -> {ByteBuffer buffer = null;while (mIsStreamRunning) {try {// Obtain the data set in blocking mode. If it cannot be obtained after waiting for 100ms, it will time out.FrameSet frameSet = mPipeline.waitForFrameSet(100);Log.d(TAG, "frameSet=" + frameSet);if (null == frameSet) {continue;}// Get depth flow dataDepthFrame depthFrame = frameSet.getDepthFrame();if (null != buffer) {buffer.clear();}Log.d(TAG, "frameSet=" + frameSet + ", depthFrame=" + depthFrame);if (null != depthFrame) {Log.d(TAG, "depth frame: " + depthFrame.getSystemTimeStamp());// Initialize bufferint dataSize = depthFrame.getDataSize();if (null == buffer || buffer.capacity() != dataSize) {buffer = ByteBuffer.allocateDirect(dataSize);}// Get data and renderdepthFrame.getData(buffer);mDepthView.update(frame.getWidth(), frame.getHeight(), StreamType.DEPTH, frame.getFormat(), frameData, frame.getValueScale());// Release depth data framedepthFrame.close();}// Release FrameSetframeSet.close();} catch (Exception e) {e.printStackTrace();}}};
try {// Stop the Pipeline and releaseif (null != mPipeline) {mPipeline.stop();mPipeline.close();mPipeline = null;}} catch (Exception e) {e.printStackTrace();}
红外示例-InfraredViewer
功能描述:本示例主要演示了SDK的初始化、设备创建、Pipeline的初始化及配置以及通过Pipeline开启指定配置红外流并渲染。 从mDevice构建Pipeline并开流// Check sensor IR existsSensor irSensor = mDevice.getSensor(SensorType.IR);if (null == irSensor) {mDevice.close();mDevice = null;return;}// Create Device and initialize Pipeline through DevicemPipeline = new Pipeline(mDevice);// Get stream profile BaseActivity#getStreamProfile(Pipeline, SensorType)VideoStreamProfile streamProfile = getStreamProfile(mPipeline, SensorType.IR);// Create Pipeline configurationConfig config = new Config();// 6.Enable IR StreamProfileif (null != streamProfile) {printStreamProfile(streamProfile.as(StreamType.VIDEO));config.enableStream(streamProfile);streamProfile.close();} else {config.close();Log.w(TAG, "No target stream profile!");return;}// Start sensor streammPipeline.start(config);// Release configconfig.close();
private Runnable mStreamRunnable = () -> {while (mIsStreamRunning) {try {// Obtain the data set in blocking mode. If it cannot be obtained after waiting for 100ms, it will time out.FrameSet frameSet = mPipeline.waitForFrameSet(100);if (null == frameSet) {continue;}// Get Infrared flow dataIRFrame frame = frameSet.getIrFrame();if (frame != null) {// Get infrared data and render itbyte[] frameData = new byte[frame.getDataSize()];frame.getData(frameData);mIrView.update(frame.getWidth(), frame.getHeight(), StreamType.IR, frame.getFormat(), frameData, 1.0f);// Release infrared data frameframe.close();}// Release FrameSetframeSet.close();} catch (Exception e) {e.printStackTrace();}}};
try {// Stop the Pipeline and releaseif (null != mPipeline) {mPipeline.stop();mPipeline.close();mPipeline = null;}} catch (Exception e) {e.printStackTrace();}
双IR示例–DoubleIRViewer
双IR示例展示如何同时打开左右IR,只有部分产品支持 创建mPipeline配置打开左右IR流Sensor irLeftSensor = mDevice.getSensor(SensorType.IR_LEFT);if (null == irLeftSensor) {showToast(getString(R.string.device_not_support_ir));mDevice.close();mDevice = null;return;}Sensor irRightSensor = mDevice.getSensor(SensorType.IR_RIGHT);if (null == irRightSensor) {showToast(getString(R.string.device_not_support_ir_right));mDevice.close();mDevice = null;return;}mPipeline = new Pipeline(mDevice);// 3.Initialize stream profileConfig config = initStreamProfile(mPipeline);if (null == config) {showToast(getString(R.string.init_stream_profile_failed));mPipeline.close();mPipeline = null;mDevice.close();mDevice = null;config.close();return;}// 4.Start sensor streammPipeline.start(config);// 5.Release configconfig.close();// 6.Create a thread to obtain Pipeline datastart();
private Config initStreamProfile(Pipeline pipeline) {// 1.Create Pipeline configurationConfig config = new Config();SensorType sensorTypes[] = {SensorType.IR_LEFT, SensorType.IR_RIGHT};for (SensorType sensorType : sensorTypes) {// Obtain the stream configuration and configure it to Config, where the matching// is performed according to the width and frame rate, and the matching satisfies// the configuration with a width of 640 and a frame rate of 30fpsVideoStreamProfile irStreamProfile = getStreamProfile(pipeline, sensorType);// Enable ir left StreamProfileif (null != irStreamProfile) {Log.d(TAG, "irStreamProfile: " + sensorType);printStreamProfile(irStreamProfile.as(StreamType.VIDEO));config.enableStream(irStreamProfile);irStreamProfile.close();} else {Log.w(TAG, ": No target stream profile! ir left stream profile is null");config.close();return null;}}return config;}
private Runnable mStreamRunnable = () -> {FrameType frameTypes[] = {FrameType.IR_LEFT, FrameType.IR_RIGHT};while (mIsStreamRunning) {try {// Obtain the data set in blocking mode. If it cannot be obtained after waiting for 100ms, it will time out.FrameSet frameSet = mPipeline.waitForFrameSet(100);if (null == frameSet) {continue;}// Get Infrared flow datafor (int i = 0; i < frameTypes.length; i++) {IRFrame frame = frameSet.getFrame(frameTypes[i]);if (frame != null) {// Get infrared data and render itbyte[] frameData = new byte[frame.getDataSize()];frame.getData(frameData);OBGLView glView = frameTypes[i] == FrameType.IR_LEFT ? mIrLeftView : mIrRightView;glView.update(frame.getWidth(), frame.getHeight(), StreamType.IR, frame.getFormat(), frameData, 1.0f);// Release infrared data frameframe.close();}}// Release FrameSetframeSet.close();} catch (Exception e) {e.printStackTrace();}}};
try {// Stop the Pipeline and releaseif (null != mPipeline) {mPipeline.stop();mPipeline.close();mPipeline = null;}} catch (Exception e) {e.printStackTrace();}
流对齐示例-SyncAlignViewer
功能描述:本示例主要演示了对数据流控制对齐的操作,该示例可能会由于深度或者彩色sensor不支持镜像而出现深度图和彩色图镜像状态不一致的情况, 从而导致深度图和彩色图显示的图像是相反的,如遇到该情况,则通过设置镜像接口保持两个镜像状态一致即可 另外可能存在某些设备获取到的分辨率不支持D2C功能,因此D2C功能以实际支持的D2C分辨率为准 例如:DaBai DCW支持的D2C的分辨率为640x360,而实际该示例获取到的分辨率可能为640x480,此时用户修改成640x360分辨率即可。 在基础模块BaseActivity中,我们介绍了genD2CStreamProfile(),流对齐需要同时配置depth和color的分辨率,以及对齐类型,实现方法如下:private Config genD2CConfig(Pipeline pipeline, AlignMode alignMode) {// Get D2CStreamProfile BaseActivity#genD2CStreamProfile(Pipeline, AlignMode)D2CStreamProfile d2CStreamProfile = genD2CStreamProfile(pipeline, alignMode);if (null == d2CStreamProfile) {return null;}// Update color information to UIVideoStreamProfile colorProfile = d2CStreamProfile.getColorProfile();// Update depth information to UIVideoStreamProfile depthProfile = d2CStreamProfile.getDepthProfile();Config config = new Config();// set D2C AlignModeconfig.setAlignMode(alignMode);config.enableStream(d2CStreamProfile.getColorProfile());config.enableStream(d2CStreamProfile.getDepthProfile());d2CStreamProfile.close();return config;}
if (null == mDevice.getSensor(SensorType.DEPTH)) {mDevice.close();mDevice = null;showToast(getString(R.string.device_not_support_depth));return;}if (null == mDevice.getSensor(SensorType.COLOR)) {mDevice.close();mDevice = null;showToast(getString(R.string.device_not_support_color));return;}mPipeline = new Pipeline(mDevice);// 3.创建Pipeline配置mConfig = genD2CConfig(mPipeline, AlignMode.ALIGN_D2C_DISABLE);if (null == mConfig) {mPipeline.close();mPipeline = null;mDevice.close();mDevice = null;Log.w(TAG, "onDeviceAttach: No target depth and color stream profile!");showToast(getString(R.string.init_stream_profile_failed));return;}// 4.通过config开流mPipeline.start(mConfig);// 5.创建获取Pipeline数据线程start();
获取数据并渲染
private Runnable mStreamRunnable = () -> {while (mIsStreamRunning) {try {// 等待100ms后如果获取不到,则超时FrameSet frameSet = mPipeline.waitForFrameSet(100);if (null == frameSet) {continue;}// 获取深度流数据DepthFrame depthFrame = frameSet.getDepthFrame();// 获取彩色流数据ColorFrame colorFrame = frameSet.getColorFrame();// 深度和彩色叠加渲染depthOverlayColorProcess(depthFrame, colorFrame);// 释放深度帧if (null != depthFrame) {depthFrame.close();}// 释放彩色帧if (null != colorFrame) {colorFrame.close();}// 释放数据集frameSet.close();} catch (Exception e) {e.printStackTrace();}}};
try {// Stop the Pipeline and releaseif (null != mPipeline) {mPipeline.stop();mPipeline.close();mPipeline = null;}} catch (Exception e) {e.printStackTrace();}
热拔插示例-HotPlugin
功能描述:本示例主要演示设备拔插回调的设置,以及拔插之后处理获取到的流。 定义Color的FrameCallbackprivate FrameCallback mColorFrameCallback = frame -> {printFrameInfo(frame.as(FrameType.COLOR), mColorFps);// 释放frame资源frame.close();};
private FrameCallback mDepthFrameCallback = frame -> {printFrameInfo(frame.as(FrameType.DEPTH), mDepthFps);// 释放frame资源frame.close();};
private FrameCallback mIrFrameCallback = frame -> {printFrameInfo(frame.as(FrameType.IR), mIrFps);// 释放frame资源frame.close();};
private void printFrameInfo(VideoFrame frame, int fps) {try {String frameInfo = "FrameType:" + frame.getStreamType()+ ", index:" + frame.getFrameIndex()+ ", width:" + frame.getWidth()+ ", height:" + frame.getHeight()+ ", format:" + frame.getFormat()+ ", fps:" + fps+ ", timeStampUs:" + frame.getTimeStampUs();if (frame.getStreamType() == FrameType.DEPTH) {frameInfo += ", middlePixelValue:" + getMiddlePixelValue(frame);}Log.i(TAG, frameInfo);} catch (Exception e) {e.printStackTrace();}}
// 实现监听设备变化private DeviceChangedCallback mDeviceChangedCallback new DeviceChangedCallback() {@Overridepublic void onDeviceAttach(DeviceList deviceList) {try {if (deviceList == null || deviceList.getDeviceCount() <= 0) {setText(mNameTv, "No device connected !");}// 2.创建设备,并获取设备名称mDevice = deviceList.getDevice(0);DeviceInfo devInfo = mDevice.getInfo();String deviceName = devInfo.getName();setText(mNameTv, deviceName);devInfo.close();// 3.获取深度传感器mDepthSensor = mDevice.getSensor(SensorType.DEPTH);// 4.打开深度流,profile传入null,表示使用配置文件中配置的参数开流,// 如果设备中没有该配置,或不存在配置文件,则表示使用Profile列表中的第一个配置if (null != mDepthSensor) {mDepthSensor.start(null, mDepthFrameCallback);} else {Log.w(TAG, "onDeviceAttach: depth sensor is unsupported!");}// 5.获取彩色传感器mColorSensor = mDevice.getSensor(SensorType.COLOR);// 6.打开彩色流,profile传入null,表示使用配置文件中配置的参数开流,// 如果设备中没有该配置,或不存在配置文件,则表示使用Profile列表中的第一个配置if (null != mColorSensor) {mColorSensor.start(null, mColorFrameCallback);} else {Log.w(TAG, "onDeviceAttach: color sensor is unsupported!");}// 7.获取红外传感器mIrSensor = mDevice.getSensor(SensorType.IR);// 8.打开红外流,profile传入null,表示使用配置文件中配置的参数开流,// 如果设备中没有该配置,或不存在配置文件,则表示使用Profile列表中的第一个配置if (null != mIrSensor) {mIrSensor.start(null, mIrFrameCallback);} else {Log.w(TAG, "onDeviceAttach: ir sensor is unsupported!");}} catch (Exception e) {e.printStackTrace();} finally {// 9.更新开流配置信息setText(mProfileInfoTv, formatProfileInfo());// 10.释放deviceList资源deviceList.close();}}@Overridepublic void onDeviceDetach(DeviceList deviceList) {try {setText(mNameTv, "No device connected !");setText(mProfileInfoTv, "");mDepthFps = 0;mColorFps = 0;mIrFps = 0;// 停止深度流if (null != mDepthSensor) {mDepthSensor.stop();}// 停止彩色流if (null != mColorSensor) {mColorSensor.stop();}// 停止红外流if (null != mIrSensor) {mIrSensor.stop();}// 释放Deviceif (null != mDevice) {mDevice.close();mDevice = null;}// 释放deviceListdeviceList.close();} catch (Exception e) {e.printStackTrace();}}};// implementation BaseActivity#getDeviceChangedCallback()@Overrideprotected DeviceChangedCallback getDeviceChangedCallback() {return mDeviceChangedCallback;}
try {// 停止深度流if (null != mDepthSensor) {mDepthSensor.stop();}// 停止彩色流if (null != mColorSensor) {mColorSensor.stop();}// 停止红外流if (null != mIrSensor) {mIrSensor.stop();}// 释放Deviceif (null != mDevice) {mDevice.close();}} catch (Exception e) {e.printStackTrace();}
IMU示例-IMU
功能描述:本示例主要演示了使用SDK获取IMU数据并输出显示。 定义IMU相关的sensor// 加速度计传感器private AccelFrame mAccelFrame;// 陀螺仪传感器private GyroFrame mGyroFrame;
// 实现监听设备变化private DeviceChangedCallback mDeviceChangedCallback = new DeviceChangedCallback() {@Overridepublic void onDeviceAttach(DeviceList deviceList) {try {if (deviceList == null || deviceList.getDeviceCount() == 0) {showToast("请接入设备");} else {// 2.创建DevicemDevice = deviceList.getDevice(0);// 3.通过Device获取加速度SensormSensorAccel = mDevice.getSensor(SensorType.ACCEL);// 4.通过Device获取陀螺仪SensormSensorGyro = mDevice.getSensor(SensorType.GYRO);if (mSensorAccel == null || mSensorGyro == null) {showToast("本设备不支持IMU");return;} else {runOnUiThread(() -> {mSurfaceViewImu.setVisibility(View.VISIBLE);});}if (mSensorAccel != null && mSensorGyro != null) {// 5.获取加速度计配置StreamProfileList accelProfileList = mSensorAccel.getStreamProfileList();if (null != accelProfileList) {mAccelStreamProfile = accelProfileList.getStreamProfile(0).as(StreamType.ACCEL);accelProfileList.close();}// 6.获取陀螺仪配置StreamProfileList gyroProfileList = mSensorGyro.getStreamProfileList();if (null != gyroProfileList) {mGyroStreamProfile = gyroProfileList.getStreamProfile(0).as(StreamType.GYRO);gyroProfileList.close();}}}} catch (Exception e) {e.printStackTrace();} finally {// 8.释放设备列表资源deviceList.close();}}@Overridepublic void onDeviceDetach(DeviceList deviceList) {try {showToast("请接入设备");deviceList.close();} catch (Exception e) {e.printStackTrace();}}};// implementation BaseActivity#getDeviceChangedCallback()@Overrideprotected DeviceChangedCallback getDeviceChangedCallback() {return mDeviceChangedCallback;}
// 2.创建DevicemDevice = deviceList.getDevice(0);// 3.通过Device获取加速度SensormSensorAccel = mDevice.getSensor(SensorType.ACCEL);// 4.通过Device获取陀螺仪SensormSensorGyro = mDevice.getSensor(SensorType.GYRO);if (mSensorAccel == null || mSensorGyro == null) {showToast("本设备不支持IMU");deviceList.close();return;} else {runOnUiThread(() -> {mSurfaceViewImu.setVisibility(View.VISIBLE);});}
if (mSensorAccel != null && mSensorGyro != null) {// 5.获取加速度计配置StreamProfileList accelProfileList = mSensorAccel.getStreamProfileList();if (null != accelProfileList) {mAccelStreamProfile = accelProfileList.getStreamProfile(0).as(StreamType.ACCEL);accelProfileList.close();}// 6.获取陀螺仪配置StreamProfileList gyroProfileList = mSensorGyro.getStreamProfileList();if (null != gyroProfileList) {mGyroStreamProfile = gyroProfileList.getStreamProfile(0).as(StreamType.GYRO);gyroProfileList.close();}}
private void startIMU() {// 7.1.初始化IMU数据刷新线程mIsRefreshIMUDataRunning = true;mRefreshIMUDataThread = new Thread(mRefreshIMUDataRunnable);mRefreshIMUDataThread.setName("RefreshIMUDataThread");// 7.2.开启IMU数据刷新线程mRefreshIMUDataThread.start();// 7.3.开始陀螺仪采样startGyroStream();// 7.4.开始加速度计采样startAccelStream();}
private void startAccelStream() {try {// 开启加速度计采样if (null != mAccelStreamProfile) {mSensorAccel.start(mAccelStreamProfile, new FrameCallback() {@Overridepublic void onFrame(Frame frame) {AccelFrame accelFrame = frame.as(FrameType.ACCEL);Log.d(TAG, "AccelFrame onFrame");synchronized (mAccelLock) {if (null != mAccelFrame) {mAccelFrame.close();mAccelFrame = null;}mAccelFrame = accelFrame;}}});mIsAccelStarted = true;}} catch (Exception e) {e.printStackTrace();}}
private void startGyroStream() {try {// 开启陀螺仪采样if (null != mGyroStreamProfile) {mSensorGyro.start(mGyroStreamProfile, new FrameCallback() {@Overridepublic void onFrame(Frame frame) {GyroFrame gyroFrame = frame.as(FrameType.GYRO);Log.d(TAG, "GyroFrame onFrame");synchronized (mGyroLock) {if (null != mGyroFrame) {mGyroFrame.close();mGyroFrame = null;}mGyroFrame = gyroFrame;}}});mIsGyroStarted = true;}} catch (Exception e) {e.printStackTrace();}}
private void drawImuInfo() {if (mIsAccelStarted || mIsGyroStarted) {synchronized (mAccelLock) {if (null != mAccelFrame) {mAccelTimeStampView.setText("AccelTimestamp:" + mAccelFrame.getTimeStamp());mAccelTemperatureView.setText(String.format("AccelTemperature:%.2f°C", mAccelFrame.getTemperature()));mAccelXView.setText(String.format("Accel.x: %.6fm/s^2", mAccelFrame.getAccelData()[0]));mAccelYView.setText(String.format("Accel.x:%.6fm/s^2", mAccelFrame.getAccelData()[1]));mAccelZView.setText(String.format("Accel.x: %.6fm/s^2", mAccelFrame.getAccelData()[2]));} else {mAccelTimeStampView.setText("AccelTimestamp: null");mAccelTemperatureView.setText("AccelTemperature: null");mAccelXView.setText("Accel.x: null");mAccelYView.setText("Accel.x: null");mAccelZView.setText("Accel.x: null");}}synchronized (mGyroLock) {if (null != mGyroFrame) {mGyroTimeStampView.setText("GyroTimestamp:" + mGyroFrame.getTimeStamp());mGyroTemperatureView.setText(String.format("GyroTemperature:%.2f°C", mGyroFrame.getTemperature()));mGyroXView.setText(String.format("Gyro.x: %.6frad/s", mGyroFrame.getGyroData()[0]));mGyroYView.setText(String.format("Gyro.x:%.6frad/s", mGyroFrame.getGyroData()[1]));mGyroZView.setText(String.format("Gyro.x: %.6frad/s", mGyroFrame.getGyroData()[2]));} else {mGyroTimeStampView.setText("GyroTimestamp: null");mGyroTemperatureView.setText("GyroTemperature: null");mGyroXView.setText("Gyro.x: null");mGyroYView.setText("Gyro.x: null");mGyroZView.setText("Gyro.x: null");}}} // if accel or gyro started}
private void stopIMU() {try {// 停止加速度计采样if (null != mSensorAccel) {mSensorAccel.stop();}// 停止陀螺仪采样if (null != mSensorGyro) {mSensorGyro.stop();}// 停止IMU数据刷新线程并释放mIsRefreshIMUDataRunning = false;if (null != mRefreshIMUDataThread) {try {mRefreshIMUDataThread.join(300);} catch (InterruptedException e) {e.printStackTrace();}mRefreshIMUDataThread = null;}} catch (Exception e) {e.printStackTrace();}}
try {// 释放加速度计配置if (null != mAccelStreamProfile) {mAccelStreamProfile.close();mAccelStreamProfile = null;}// 释放陀螺仪配置if (null != mGyroStreamProfile) {mGyroStreamProfile.close();mGyroStreamProfile = null;}// 释放Deviceif (null != mDevice) {mDevice.close();mDevice = null;}} catch (Exception e) {e.printStackTrace();}
多设备示例-MultiDevice
功能描述:本示例主要演示了对多设备进行操作。 首先需要创建一个Context,用于获取设备信息列表和创建设备private OBContext mOBContext;
// 实现监听设备变化private DeviceChangedCallback mDeviceChangedCallback = new DeviceChangedCallback() {@Overridepublic void onDeviceAttach(DeviceList deviceList) {try {int count = deviceList.getDeviceCount();for (int i = 0; i < count; i++) {// 创建设备Device device = deviceList.getDevice(i);// 获取DeviceInfoDeviceInfo devInfo = device.getInfo();// 获取设备名称String name = devInfo.getName();// 获取设备uidString uid = devInfo.getUid();// 获取设备连接类型String connectionType = devInfo.getConnectionType();// 释放DeviceInfo资源devInfo.close();runOnUiThread(() -> {mDeviceControllerAdapter.addItem(new DeviceBean(name, uid, connectionType, device));});}} catch (Exception e) {e.printStackTrace();} finally {// 释放设备列表资源deviceList.close();}}@Overridepublic void onDeviceDetach(DeviceList deviceList) {try {for (DeviceBean deviceBean : mDeviceBeanList) {// 通过uid判断下线设备if (deviceBean.getDeviceUid().equals(deviceList.getUid(0))) {// 释放下线设备资源deviceBean.getDevice().close();runOnUiThread(() -> {mDeviceControllerAdapter.deleteItem(deviceBean);});}}} catch (Exception e) {Log.w(TAG, "onDeviceDetach: " + e.getMessage());} finally {// 释放设备列表资源deviceList.close();}}};
int count = deviceList.getDeviceCount();for (int i = 0; i < count; i++) {// 创建设备Device device = deviceList.getDevice(i);// 获取DeviceInfoDeviceInfo devInfo = device.getInfo();// 获取设备名称String name = devInfo.getName();// 获取设备uidString uid = devInfo.getUid();// 获取设备连接类型String connectionType = devInfo.getConnectionType();// 释放DeviceInfo资源devInfo.close();runOnUiThread(() -> {mDeviceControllerAdapter.addItem(new DeviceBean(name, uid, connectionType, device));});}
private void startStream(Sensor sensor, OBGLView glView) {if (null == sensor) {return;}try {// 获取传感器的流配置列表StreamProfileList profileList = sensor.getStreamProfileList();if (null == profileList) {Log.w(TAG, "start stream failed, profileList is null !");return;}switch (sensor.getType()) {case DEPTH:OBGLView depthGLView = glView;// 通过StreamProfileList获取开流配置StreamProfile depthProfile = getVideoStreamProfile(profileList, 640, 0, Format.UNKNOWN, 30);if (null != depthProfile) {printStreamProfile(depthProfile.as(StreamType.VIDEO));// 通过指定配置开流sensor.start(depthProfile, frame -> {DepthFrame depthFrame = frame.as(FrameType.DEPTH);byte[] bytes = new byte[depthFrame.getDataSize()];depthFrame.getData(bytes);// 渲染数据depthGLView.update(depthFrame.getWidth(), depthFrame.getHeight(),StreamType.DEPTH, depthFrame.getFormat(), bytes, depthFrame.getValueScale());// 释放frame资源frame.close();});// 释放profile资源depthProfile.close();} else {Log.w(TAG, "start depth stream failed, depthProfile is null!");}break;case COLOR:OBGLView colorGLView = glView;// 通过StreamProfileList获取开流配置StreamProfile colorProfile = getVideoStreamProfile(profileList, 640, 0, Format.RGB888, 30);if (null == colorProfile) {colorProfile = getVideoStreamProfile(profileList, 640, 0, Format.UNKNOWN, 30);}if (null != colorProfile) {printStreamProfile(colorProfile.as(StreamType.VIDEO));// 通过指定配置开流sensor.start(colorProfile, frame -> {ColorFrame colorFrame = frame.as(FrameType.COLOR);byte[] bytes = new byte[colorFrame.getDataSize()];// 获取frame数据colorFrame.getData(bytes);// 渲染数据colorGLView.update(colorFrame.getWidth(), colorFrame.getHeight(), StreamType.COLOR, colorFrame.getFormat(), bytes, 1.0f);// 释放frame资源frame.close();});// 释放profile资源colorProfile.close();} else {Log.w(TAG, "start color stream failed, colorProfile is null!");}break;case IR:OBGLView irGLView = glView;// 通过StreamProfileList获取开流配置StreamProfile irProfile = getVideoStreamProfile(profileList, 640, 0, Format.UNKNOWN, 30);if (null != irProfile) {printStreamProfile(irProfile.as(StreamType.VIDEO));// 通过指定配置开流sensor.start(irProfile, frame -> {IRFrame irFrame = frame.as(FrameType.IR);byte[] bytes = new byte[irFrame.getDataSize()];// 获取frame数据irFrame.getData(bytes);// 渲染数据irGLView.update(irFrame.getWidth(), irFrame.getHeight(),StreamType.IR, irFrame.getFormat(), bytes, 1.0f);// frame资源frame.close();});// 释放profile资源irProfile.close();} else {Log.w(TAG, "start ir stream failed, irProfile is null!");}break;}// 释放profileList资源profileList.close();} catch (Exception e) {Log.w(TAG, "startStream: " + e.getMessage());}}
private void stopStream(Sensor sensor) {if (null == sensor) {return;}try {sensor.stop();} catch (Exception e) {e.printStackTrace();}}
try {for (DeviceBean deviceBean : mDeviceBeanList) {// 通过uid判断下线设备if (deviceBean.getDeviceUid().equals(deviceList.getUid(0))) {// 释放下线设备资源deviceBean.getDevice().close();runOnUiThread(() -> {mDeviceControllerAdapter.deleteItem(deviceBean);});}}} catch (Exception e) {Log.w(TAG, "onDeviceDetach: " + e.getMessage());} finally {// 释放设备列表资源deviceList.close();}
try {// 释放资源for (DeviceBean deviceBean : mDeviceBeanList) {try {// 释放设备资源deviceBean.getDevice().close();} catch (Exception e) {Log.w(TAG, "onDestroy: " + e.getMessage());}}mDeviceBeanList.clear();// 释放SDKif (null != mOBContext) {mOBContext.close();}} catch (Exception e) {e.printStackTrace();}
点云示例-PointCloud
功能描述:本示例主要演示了连接设备开流 ,生成深度点云或RGBD点云并保存成ply格式文件。 在基础模块BaseActivity中,我们介绍了genD2CStreamProfile(),流对齐需要同时配置depth和color的分辨率,以及对齐类型,实现方法如下:private Config genD2CConfig(Pipeline pipeline, AlignMode alignMode) {// Get D2CStreamProfile BaseActivity#genD2CStreamProfile(Pipeline, AlignMode)D2CStreamProfile d2CStreamProfile = genD2CStreamProfile(pipeline, alignMode);if (null == d2CStreamProfile) {return null;}// Update color information to UIVideoStreamProfile colorProfile = d2CStreamProfile.getColorProfile();// Update depth information to UIVideoStreamProfile depthProfile = d2CStreamProfile.getDepthProfile();Config config = new Config();// set D2C AlignModeconfig.setAlignMode(alignMode);config.enableStream(d2CStreamProfile.getColorProfile());config.enableStream(d2CStreamProfile.getDepthProfile());d2CStreamProfile.close();return config;}
// 实现监听设备变化private DeviceChangedCallback mDeviceChangedCallback = new DeviceChangedCallback() {@Overridepublic void onDeviceAttach(DeviceList deviceList) {try {if (null == mPipeline) {// 2.Create Device and initialize Pipeline through DevicemDevice = deviceList.getDevice(0);if (null == mDevice.getSensor(SensorType.COLOR)) {mDevice.close();mDevice = null;showToast(getString(R.string.device_not_support_color));runOnUiThread(() -> {mSaveColorPointsBtn.setEnabled(false);});}if (null == mDevice.getSensor(SensorType.DEPTH)) {mDevice.close();mDevice = null;showToast(getString(R.string.device_not_support_depth));return;}// 3.Create Device and initialize Pipeline through DevicemPipeline = new Pipeline(mDevice);// 4.Create Config to configure pipeline opening sensorsConfig config = genD2CConfig(mPipeline, AlignMode.ALIGN_D2C_HW_ENABLE);if (null == config) {mPipeline.close();mPipeline = null;mDevice.close();mDevice = null;Log.w(TAG, "onDeviceAttach: No target depth and color stream profile!");showToast(getString(R.string.init_stream_profile_failed));return;}// 5.Start sensors streammPipeline.start(config, mPointCloudFrameSetCallback);// 6.Start the point cloud asynchronous processing threadstart();// 7.Create point cloud filtermPointCloudFilter = new PointCloudFilter();// 8.Set the format of the point cloud filtermPointCloudFilter.setPointFormat(mPointFormat);// 9.Obtain camera intrinsic parameters and set parameters to point cloud filterCameraParam cameraParam = mPipeline.getCameraParam();mPointCloudFilter.setCameraParam(cameraParam);Log.i(TAG, "onDeviceAttach: cameraParam:" + cameraParam);// 10.Release config resourcesconfig.close();}} catch (Exception e) {e.printStackTrace();} finally {// 16.释放设备列表资源deviceList.close();}}@Overridepublic void onDeviceDetach(DeviceList deviceList) {try {deviceList.close();} catch (Exception e) {e.printStackTrace();}}};
// Pipeline开流的回调private FrameSetCallback mPointCloudFrameSetCallback = frameSet -> {if (null != frameSet) {if (mIsPointCloudRunning) {if (null == mPointFrameSet) {mPointFrameSet = frameSet;return;}}frameSet.close();}};
while (mIsPointCloudRunning) {try {if (null != mPointFrameSet) {Frame frame = null;if (mPointFormat == Format.POINT) {// 设置保存格式为深度点云mPointCloudFilter.setPointFormat(Format.POINT);} else {// 设置保存格式为彩色点云mPointCloudFilter.setPointFormat(Format.RGB_POINT);}// 点云保存时要注意深度进度单位DepthFrame depthFrame = mPointFrameSet.getDepthFrame();if (null != depthFrame) {// 更新点云的深度进度单位mPointCloudFilter.setPositionDataScale(depthFrame.getValueScale());depthFrame.close();}// 点云filter处理生成对应的点云数据frame = mPointCloudFilter.process(mPointFrameSet);if (null != frame) {// 获取点云帧PointFrame pointFrame = frame.as(FrameType.POINTS);if (mIsSavePoints) {if (mPointFormat == Format.POINT) {// 获取深度点云数据并保存,深度点云的数据大小为w * h * 3float[] depthPoints = new float[pointFrame.getDataSize() / Float.BYTES];pointFrame.getPointCloudData(depthPoints);String depthPointsPath = mSdcardDir.toString() + "/Orbbec/point.ply";FileUtils.savePointCloud(depthPointsPath, depthPoints);runOnUiThread(new Runnable() {@Overridepublic void run() {mInfoTv.append("Save Path:" + depthPointsPath + "\n");}});} else {// 获取彩色点云数据并保存,彩色点云的数据大小为w * h * 6float[] colorPoints = new float[pointFrame.getDataSize() / Float.BYTES];pointFrame.getPointCloudData(colorPoints);String colorPointsPath = mSdcardDir.toString() + "/Orbbec/point_rgb.ply";FileUtils.saveRGBPointCloud(colorPointsPath, colorPoints);runOnUiThread(new Runnable() {@Overridepublic void run() {mInfoTv.append("Save Path:" + colorPointsPath + "\n");}});}mIsSavePoints = false;}// 释放新生成的frameframe.close();}// 释放原始数据frameSetmPointFrameSet.close();mPointFrameSet = null;}} catch (Exception e) {e.printStackTrace();}}
public static void savePointCloud(String fileName, float[] data)
public static void saveRGBPointCloud(String fileName, float[] data)
try {// 停止Pipeline,并关闭if (null != mPipeline) {mPipeline.stop();mPipeline.close();mPipeline = null;}// 释放点云filterif (null != mPointCloudFilter) {try {mPointCloudFilter.close();} catch (Exception e) {}mPointCloudFilter = null;}// 释放Deviceif (mDevice != null) {mDevice.close();mDevice = null;}} catch (Exception e) {e.printStackTrace();}
存储示例-SaveToDisk
功能描述:本示例用于演示连接设备开流 , 获取彩色存储为png格式,深度存储为raw格式以及通过filter进行格式转换。 首先需要创建一个Context,用于获取设备信息列表和创建设备private OBContext mOBContext;
// 实现监听设备变化private DeviceChangedCallback mDeviceChangedCallback = new DeviceChangedCallback() {@Overridepublic void onDeviceAttach(DeviceList deviceList) {try {if (null == mPipeline) {// 2.Create Device and initialize Pipeline through DevicemDevice = deviceList.getDevice(0);if (null == mDevice.getSensor(SensorType.DEPTH)) {depthCount = 5;showToast(getString(R.string.device_not_support_depth));}if (null == mDevice.getSensor(SensorType.COLOR)) {colorCount = 5;showToast(getString(R.string.device_not_support_color));}mPipeline = new Pipeline(mDevice);// 3.Initialize the format conversion filterif (null != mFormatConvertFilter) {mFormatConvertFilter = new FormatConvertFilter();}// 4.Create Pipeline configurationConfig config = new Config();// 5.Get the color Sensor VideoStreamProfile and configure it to Configtry {VideoStreamProfile colorStreamProfile = getStreamProfile(mPipeline, SensorType.COLOR);// 6.Enable color sensor through the obtained color sensor configurationif (null != colorStreamProfile) {printStreamProfile(colorStreamProfile.as(StreamType.VIDEO));config.enableStream(colorStreamProfile);colorStreamProfile.close();} else {Log.w(TAG, "onDeviceAttach: No target color stream profile!");}} catch (Exception e) {e.printStackTrace();}// 7.Get the depth sensor configuration and configure it to Configtry {VideoStreamProfile depthStreamProfile = getStreamProfile(mPipeline, SensorType.DEPTH);// 8.Enable depth sensor through the obtained depth sensor configurationif (null != depthStreamProfile) {printStreamProfile(depthStreamProfile.as(StreamType.VIDEO));config.enableStream(depthStreamProfile);depthStreamProfile.close();} else {Log.w(TAG, "onDeviceAttach: No target depth stream profile!");}} catch (Exception e) {e.printStackTrace();}initSaveImageDir();// 9.Open Pipeline with ConfigmPipeline.start(config);// 10.Release config resourcesconfig.close();// 11.Create a pipeline data acquisition thread and a picture saving threadstart();}} catch (Exception e) {e.printStackTrace();} finally {// 12.Release DeviceListdeviceList.close();}}@Overridepublic void onDeviceDetach(DeviceList deviceList) {try {if (mDevice != null) {for (int i = 0, N = deviceList.getDeviceCount(); i < N; i++) {String uid = deviceList.getUid(i);DeviceInfo deviceInfo = mDevice.getInfo();if (null != deviceInfo && TextUtils.equals(uid, deviceInfo.getUid())) {stop();mPipeline.stop();mPipeline.close();mPipeline = null;mDevice.close();mDevice = null;}deviceInfo.close();}}} catch (Exception e) {e.printStackTrace();} finally {try {deviceList.close();} catch (Exception ignore) {}}}};
private void start() {colorCount = 0;depthCount = 0;mIsStreamRunning = true;mIsPicSavingRunning = true;if (null == mStreamThread) {mStreamThread = new Thread(mStreamRunnable);mStreamThread.start();}if (null == mPicSavingThread) {mPicSavingThread = new Thread(mPicSavingRunnable);mPicSavingThread.start();}}
int count = 0;ByteBuffer colorSrcBuf = null;ByteBuffer colorDstBuf = null;while (mIsStreamRunning) {try {// 等待100ms后如果获取不到,则超时FrameSet frameSet = mPipeline.waitForFrameSet(100);if (null == frameSet) {continue;}if (count < 5) {frameSet.close();count++;continue;}// 获取彩色流数据ColorFrame colorFrame = frameSet.getColorFrame();if (null != colorFrame) {Frame rgbFrame = null;switch (colorFrame.getFormat()) {case MJPG:mFormatConvertFilter.setFormatType(FormatConvertType.FORMAT_MJPEG_TO_RGB888);rgbFrame = mFormatConvertFilter.process(colorFrame);break;case YUYV:mFormatConvertFilter.setFormatType(FormatConvertType.FORMAT_YUYV_TO_RGB888);rgbFrame = mFormatConvertFilter.process(colorFrame);break;case UYVY:FrameCopy frameCopy = copyToFrameT(colorFrame);if (null == colorSrcBuf || colorSrcBuf.capacity() != colorFrame.getDataSize()) {colorSrcBuf = ByteBuffer.allocateDirect(colorFrame.getDataSize());}colorSrcBuf.clear();colorFrame.getData(colorSrcBuf);int colorDstSize = colorFrame.getWidth() * colorFrame.getHeight() * 3;if (null == colorDstBuf || colorDstBuf.capacity() != colorDstSize) {colorDstBuf = ByteBuffer.allocateDirect(colorDstSize);}colorDstBuf.clear();ImageUtils.uyvyToRgb(colorSrcBuf, colorDstBuf, colorFrame.getWidth(), colorFrame.getHeight());frameCopy.data = new byte[colorDstSize];colorDstBuf.get(frameCopy.data);mFrameSaveQueue.offer(frameCopy);break;default:Log.w(TAG, "Unsupported color format!");break;}if (null != rgbFrame) {FrameCopy frameCopy = copyToFrameT(rgbFrame.as(FrameType.VIDEO));mFrameSaveQueue.offer(frameCopy);rgbFrame.close();}colorFrame.close();}// 获取深度流数据DepthFrame depthFrame = frameSet.getDepthFrame();if (null != depthFrame) {FrameCopy frameT = copyToFrameT(depthFrame);mFrameSaveQueue.offer(frameT);depthFrame.close();}// 释放数据集frameSet.close();} catch (Exception e) {e.printStackTrace();}}
while (mIsPicSavingRunning) {try {FrameCopy frameT = mFrameSaveQueue.poll(300, TimeUnit.MILLISECONDS);if (null != frameT) {Log.d(TAG, "colorCount :" + colorCount);if (frameT.getStreamType() == FrameType.COLOR && colorCount < 5) {FileUtils.saveImage(frameT);colorCount++;}Log.d(TAG, "depthCount :" + depthCount);if (frameT.getStreamType() == FrameType.DEPTH && depthCount < 5) {FileUtils.saveImage(frameT);depthCount++;}}} catch (Exception e) {}if (colorCount == 5 && depthCount == 5) {mIsPicSavingRunning = false;break;}}mFrameSaveQueue.clear();
private void stop() {mIsStreamRunning = false;mIsPicSavingRunning = false;if (null != mStreamThread) {try {mStreamThread.join(1000);} catch (InterruptedException e) {}mStreamThread = null;}if (null != mPicSavingThread) {try {mPicSavingThread.join(1000);} catch (InterruptedException e) {}mPicSavingThread = null;}}
try {// 释放filter资源if (null != mFormatConvertFilter) {try {mFormatConvertFilter.close();} catch (Exception e) {e.printStackTrace();}}// 停止Pipeline,并关闭if (null != mPipeline) {mPipeline.stop();mPipeline.close();mPipeline = null;}// 释放Device资源if (null != mDevice) {mDevice.close();mDevice = null;}} catch (Exception e) {e.printStackTrace();}
传感器控制示例-SensorControl
功能描述:本示例主要演示了对device控制命令的操作、对Sensor控制命令的操作。 属性操作请阅读OrbbecSdkExamples代码SensorControlActivity.java录制与回放示例-Recorder & Playback
功能描述: :连接设备开流 , 录制当前视频流到文件,载入视频文件进行回放。 监听设备变化private DeviceChangedCallback mDeviceChangedCallback = new DeviceChangedCallback() {@Overridepublic void onDeviceAttach(DeviceList deviceList) {try {if (null == mPipeline) {// 2.Create Device and initialize Pipeline through DevicemDevice = deviceList.getDevice(0);if (null == mDevice.getSensor(SensorType.DEPTH)) {showToast(getString(R.string.device_not_support_depth));return;}mPipeline = new Pipeline(mDevice);// 3.Update device information viewupdateDeviceInfoView(false);// 4.Create Pipeline configurationmConfig = new Config();// 5.Get the depth flow configuration and configure it to ConfigVideoStreamProfile streamProfile = getStreamProfile(mPipeline, SensorType.DEPTH);// 6.Enable deep sensor configurationif (null != streamProfile) {printStreamProfile(streamProfile.as(StreamType.VIDEO));mConfig.enableStream(streamProfile);streamProfile.close();} else {mDevice.close();mDevice = null;mPipeline.close();mPipeline = null;mConfig.close();mConfig = null;Log.w(TAG, "onDeviceAttach: No target stream profile!");showToast(getString(R.string.init_stream_profile_failed));return;}// 7.Start pipelinemPipeline.start(mConfig);// 8.Create a thread to obtain Pipeline datastart();runOnUiThread(() -> {mStartRecordBtn.setEnabled(true);});}} catch (Exception e) {e.printStackTrace();} finally {// 9.Release DeviceListdeviceList.close();}}@Overridepublic void onDeviceDetach(DeviceList deviceList) {try {release();runOnUiThread(() -> {mStartRecordBtn.setEnabled(false);mStopRecordBtn.setEnabled(false);mStartPlaybackBtn.setEnabled(isPlayFileValid());mStopPlaybackBtn.setEnabled(false);});} catch (Exception e) {e.printStackTrace();} finally {deviceList.close();}}};
/*** Start recording*/private void startRecord() {try {if (!mIsRecording) {if (null != mPipeline) {// Start recordingmPipeline.startRecord(mRecordFilePath);mIsRecording = true;} else {Log.w(TAG, "mPipeline is null !");}}} catch (Exception e) {e.printStackTrace();}}/*** stop recording*/private void stopRecord() {try {if (mIsRecording) {mIsRecording = false;if (null != mPipeline) {// stop recordingmPipeline.stopRecord();}}} catch (Exception e) {e.printStackTrace();}}
/*** Start playback*/private void startPlayback() {try {if (!FileUtils.isFileExists(mRecordFilePath)) {Toast.makeText(RecordPlaybackActivity.this, "File not found!", Toast.LENGTH_LONG).show();return;}if (!mIsPlaying) {mIsPlaying = true;// Release Playback resourcesif (null != mPlayback) {mPlayback.close();mPlayback = null;}// Create a playback pipelineif (null != mPlaybackPipe) {mPlaybackPipe.close();mPlaybackPipe = null;}// Create Playback PipelinemPlaybackPipe = new Pipeline(mRecordFilePath);// Get the Playback from PipelinemPlayback = mPlaybackPipe.getPlayback();// Set playback status callbackmPlayback.setMediaStateCallback(mMediaStateCallback);// start playbackmPlaybackPipe.start(null);// Create a playback threadif (null == mPlaybackThread) {mPlaybackThread = new Thread(mPlaybackRunnable);mPlaybackThread.start();}}} catch (Exception e) {e.printStackTrace();}}/*** stop playback*/private void stopPlayback() {try {if (mIsPlaying) {mIsPlaying = false;// stop playback threadif (null != mPlaybackThread) {try {mPlaybackThread.join(300);} catch (InterruptedException e) {}mPlaybackThread = null;}// stop playbackif (null != mPlaybackPipe) {mPlaybackPipe.stop();}}} catch (Exception e) {e.printStackTrace();}}
// playback threadprivate Runnable mPlaybackRunnable = () -> {while (mIsPlaying) {try {// If it cannot be obtained after waiting for 100ms, it will time outFrameSet frameSet = mPlaybackPipe.waitForFrameSet(100);if (null == frameSet) {continue;}// Get depth stream dataDepthFrame depthFrame = frameSet.getDepthFrame();if (null != depthFrame) {// Get depth data and renderbyte[] frameData = new byte[depthFrame.getDataSize()];depthFrame.getData(frameData);synchronized (mSync) {mDepthGLView.update(depthFrame.getWidth(), depthFrame.getHeight(), StreamType.DEPTH, depthFrame.getFormat(), frameData, depthFrame.getValueScale());}// Release the depth data framedepthFrame.close();}// Release FrameSetframeSet.close();} catch (Exception e) {e.printStackTrace();}}};
try {// Stop getting Pipeline datastop();// stop playback threadif (mIsPlaying) {mIsPlaying = false;if (null != mPlaybackThread) {try {mPlaybackThread.join(300);} catch (InterruptedException e) {}mPlaybackThread = null;}}// release playbackif (null != mPlayback) {mPlayback.close();mPlayback = null;}


